
Holiday Decorating Ideas - an Accent Wall with a Semi-Homemade Wreath
/Hello friends -
I love bringing in fresh new designs to my home over the holidays and so today - I'm showing you a design idea that you can add to any room in your house. It's a wood accent wall and a semi-homemade holiday wreath.
Accent Wall:
For my wood accent wall, I am using a product from Weaber Lumber called Weathered Wall Boards. You can find these wall boards at Home Depot. There are many different styles to choose from that will give your walls an authentic barn wood look.
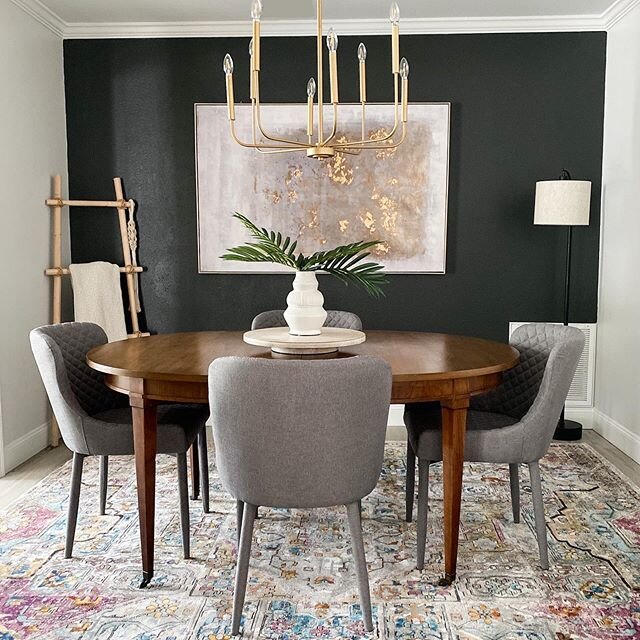
I chose to use the white washed weathered wall boards in my Dining Room and I am thrilled with how this wall turned out! The boards are slightly white washed with some of the knots of the wood showing through. It's truly amazing at how something so simple has brought such texture and charm to our Dining Room space. Here's how we put these up (I say "we" because my hubby helped me!).
Supplies Needed:
Weaber Wall Boards (Each are approx. 4" x 48" x 1/2")
Tape Measure
Stud Finder
Chop Saw
Nail Gun (We used a Pin Nailer)
Pencil
1. Measure your wall or space where you'll be adding your boards. Multiply the height times the width then divide that number by 144. This will give you an idea of how many square feet you will need. I used 4 boxes for an area of 64" x 75" or 33 sq. ft. Keep in mind that you'll need a few extra boards for slip - ups!
2. Find the studs with a stud finder and mark the bottom of the wall so that you know what areas to nail down.
3. Decide the type of pattern or style you want to design with the boards. I decided on a simple , staggered horizontal pattern but you can go vertical or even mix up the boards for a cool herringbone pattern.
4. If you have outlets, you should take off the outlet covers and plan to cut around these. (I didn't have to worry about this because we only did the top half of my wall.)
5. Starting at the top or the bottom...place your first board down and using your nail gun...nail the board into place where the stud is. We chose to start at the bottom because we thought it would be less distracting to have a smaller board finishing at the top. You may also choose to use Liquid Nails on the back of the boards for a more permanent installation.
6. Measure and cut each board to the size that you want them. Mix up the size and color (some are a bit different which adds to the texture) along your wall making sure that each board is placed to your liking.
7. When you finish with your last board, you may need to strip the board using a table saw to fit the space. We did this for the top piece and then we attached our curtain brackets to the boards.
8. Finish with trim if desired. We chose to keep ours without trim since it's between two windows.
9. Enjoy your new accent wall! These boards give such beautiful character to any space!
Semi-Homemade Holiday Wreath
Supplies Needed:
- Faux Evergreen Wreath on a wire frame (you can find these at any Craft Store - Michael's, JoAnne's, etc). I used a larger wreath that I had on hand (32" diameter).
- Various styles of fresh greens, evergreen and sticks or pinecones. (I picked mine out of my yard)
1. Hang your wreath on the wall or wherever you're putting it.
2. Fluff it out. I placed a sprig of faux pinecones into the wreath at this stage, too but if you don't have this on hand...that is okay.
3. Begin by cutting your greenery to pieces that are 5-7" and then simply tuck these into the faux greenery.
4. I finished with adding sticks in the bottom right corner of my wreath.
5. Enjoy!
Just an FYI: This wreath is meant to be enjoyed a day or two prior to guests arriving. The real greenery will begin to dry out within a week or so but you can always pull out the dry pieces and replace them with new, fresh ones!
From our home to yours....Happy Thanksgiving!
Warmly,