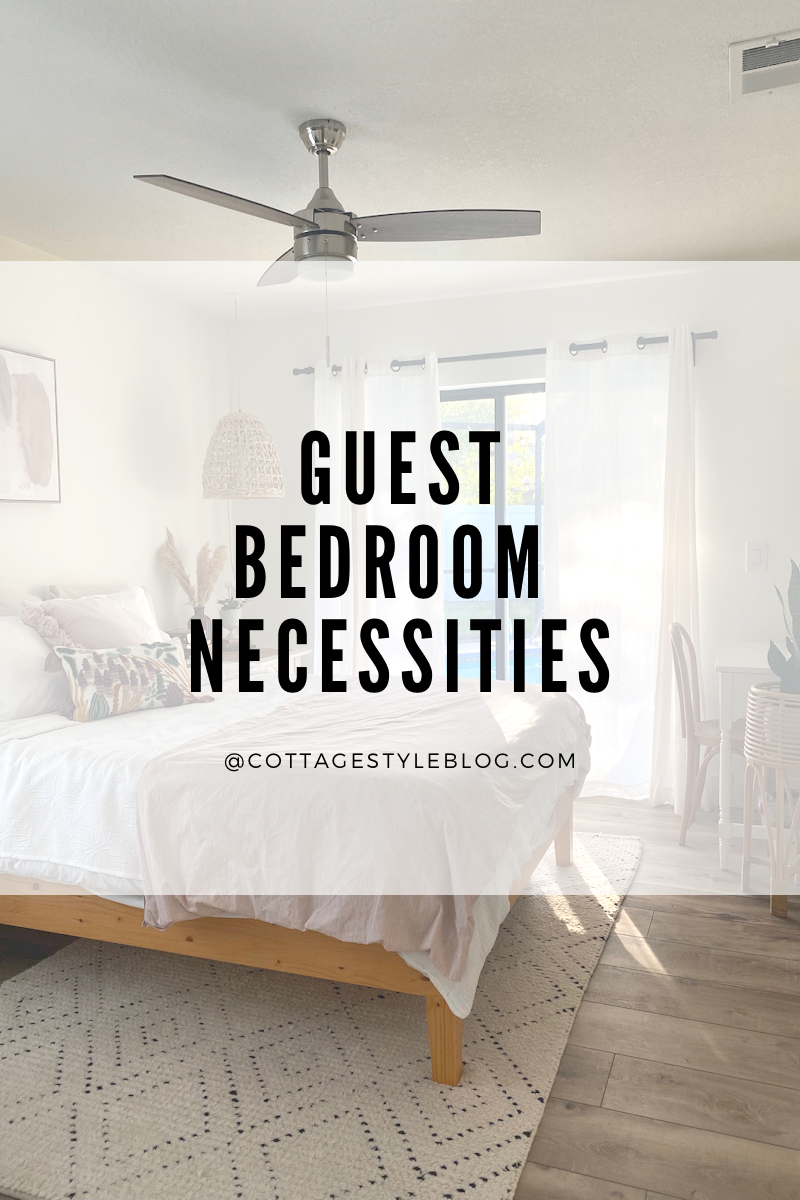

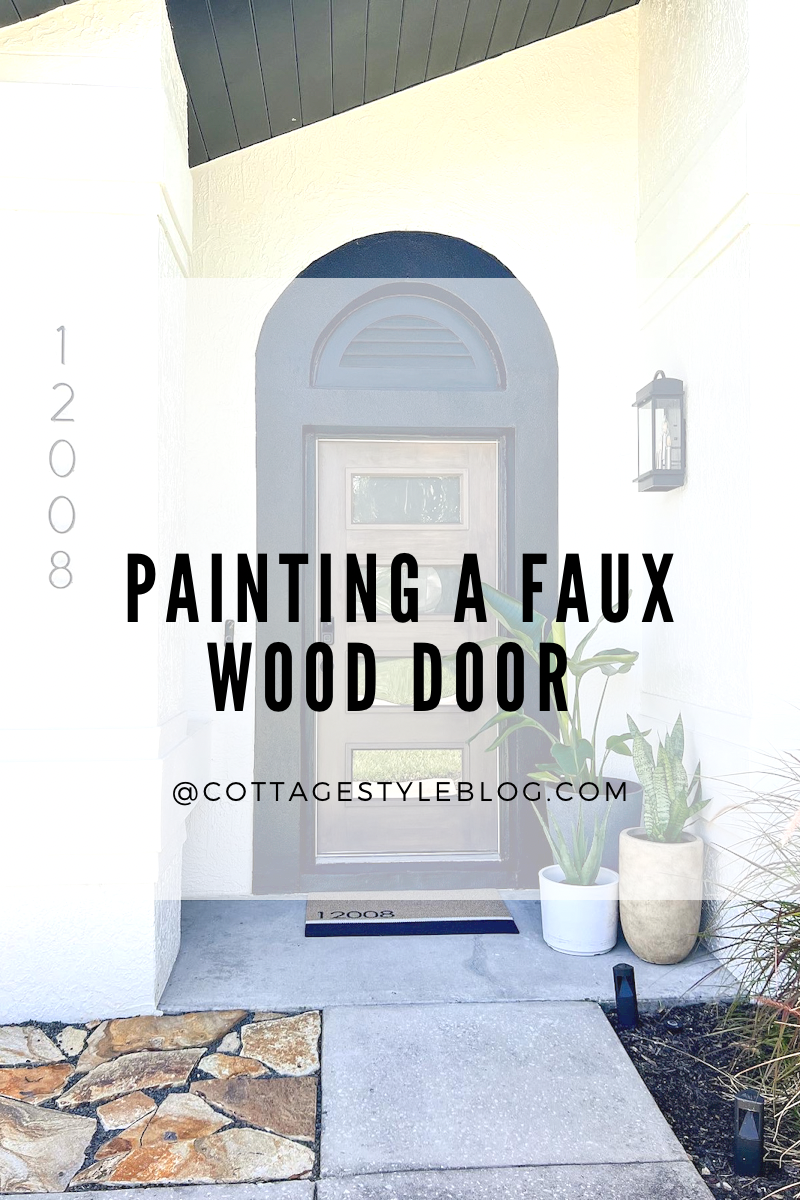
Painting a Faux Wood Door
/
Hello friends!
When we started to renovate this house back in September of last year, we were looking for a new front door. We ended up finding this fiberglass one at a Building Supply Warehouse and it fit our front entryway perfectly! (That’s no easy feat as this entryway is a strange size.) I’ve kept it white for the 8 months, but I recently got the itch to transform it. :-)
I love the look of wood doors. However, wood doors can be pricey. So, I thought. “I’m going to try to make this fiberglass door look like an expensive wood door for half the cost!” And, so this is what I did…..
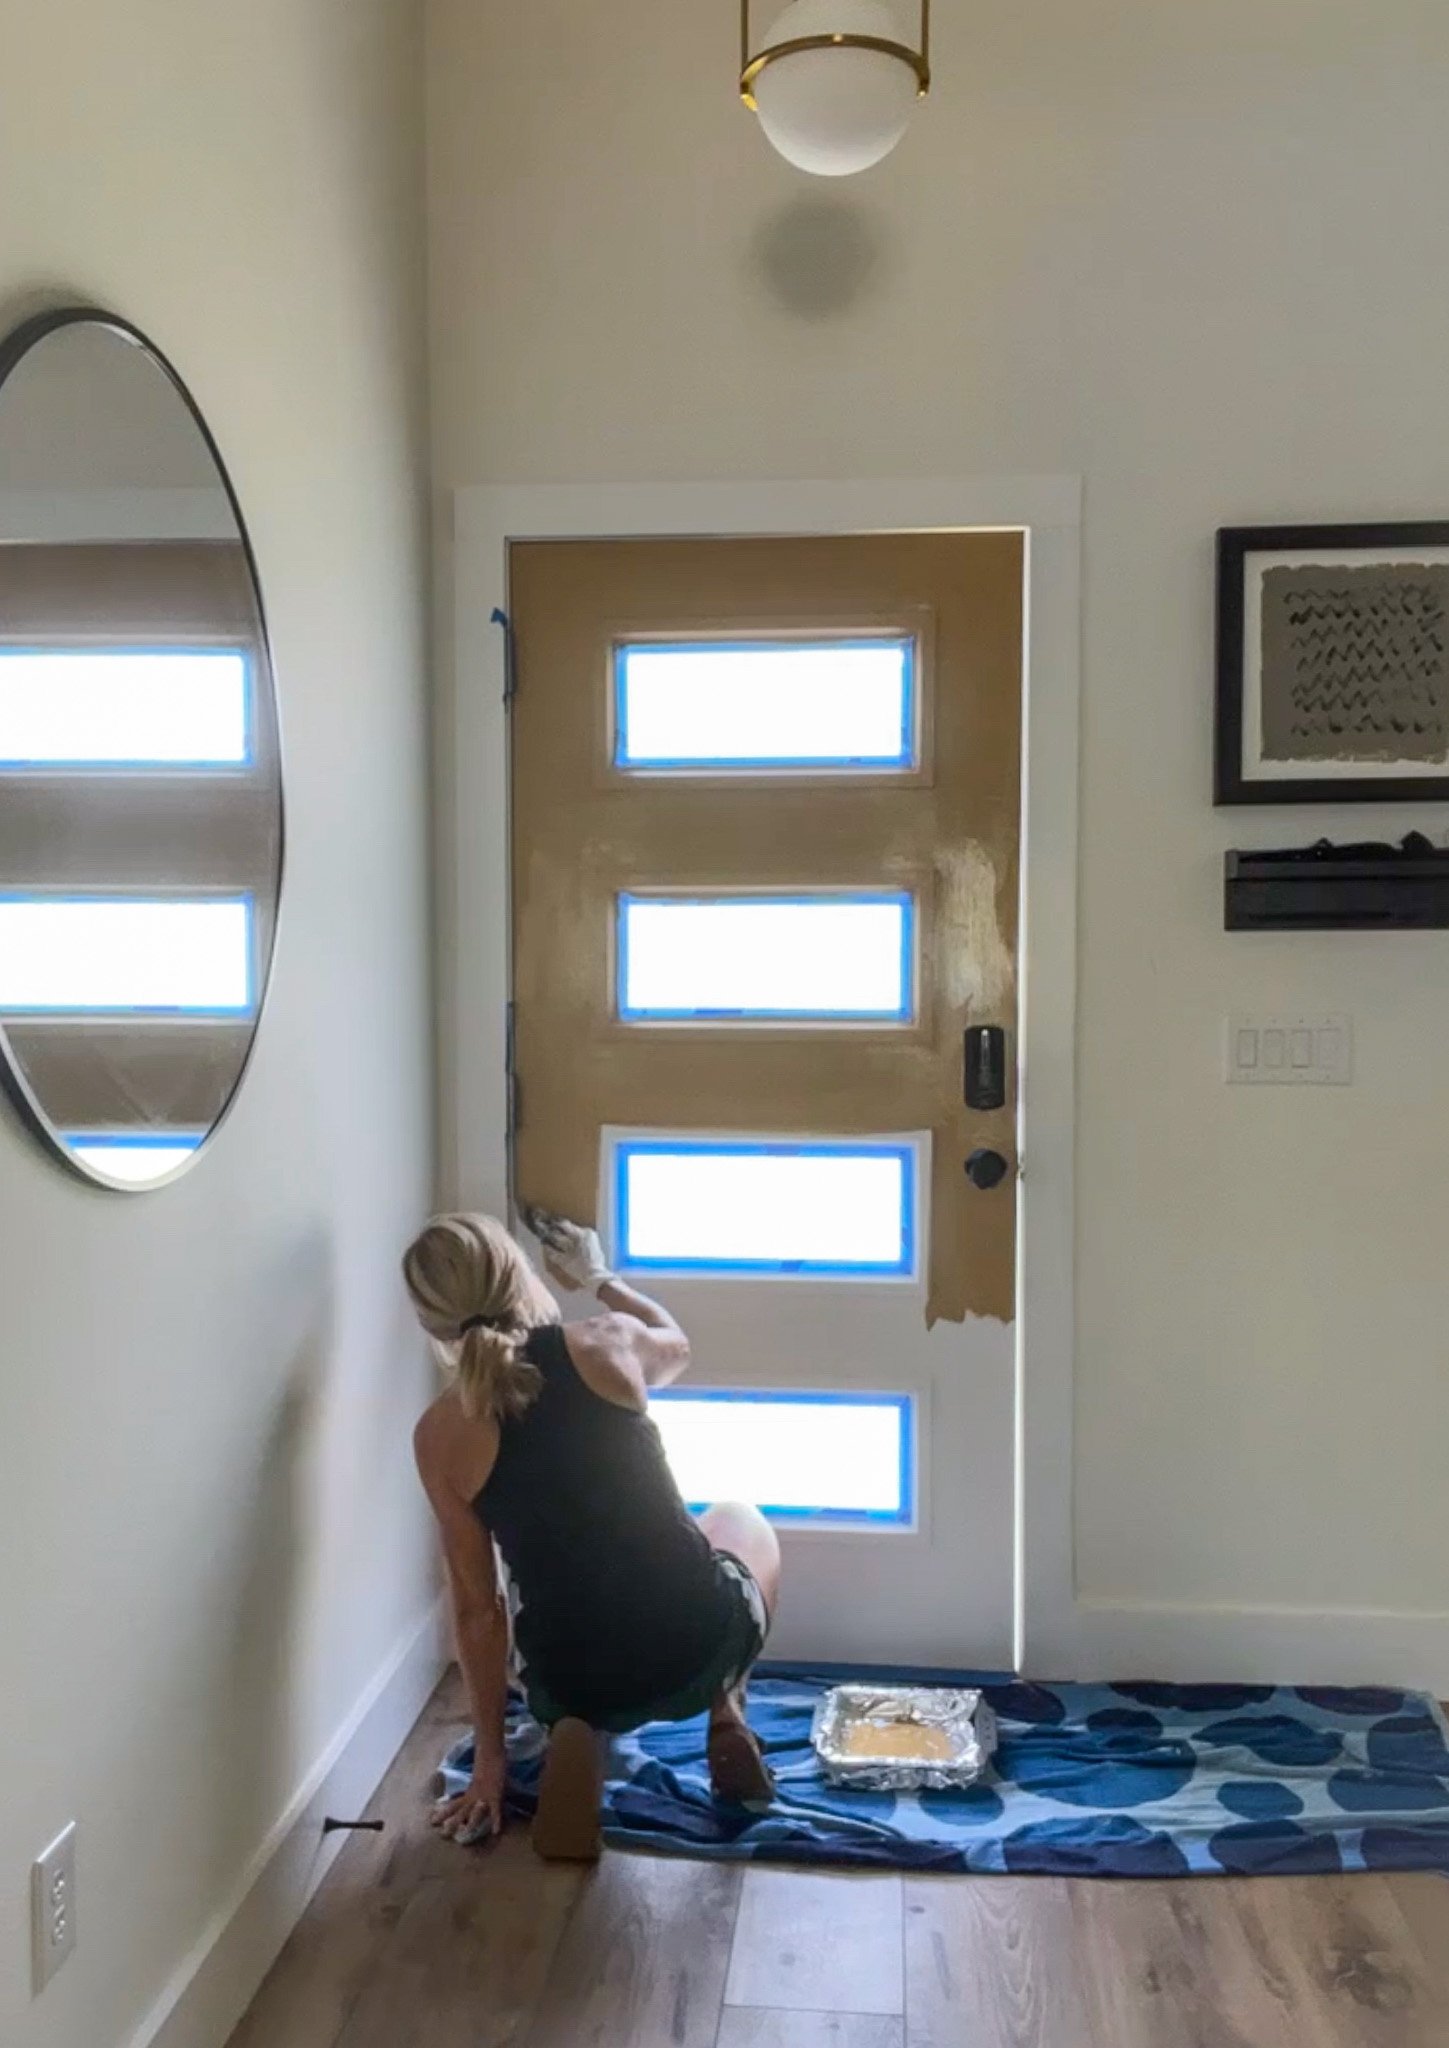
First a BEFORE:

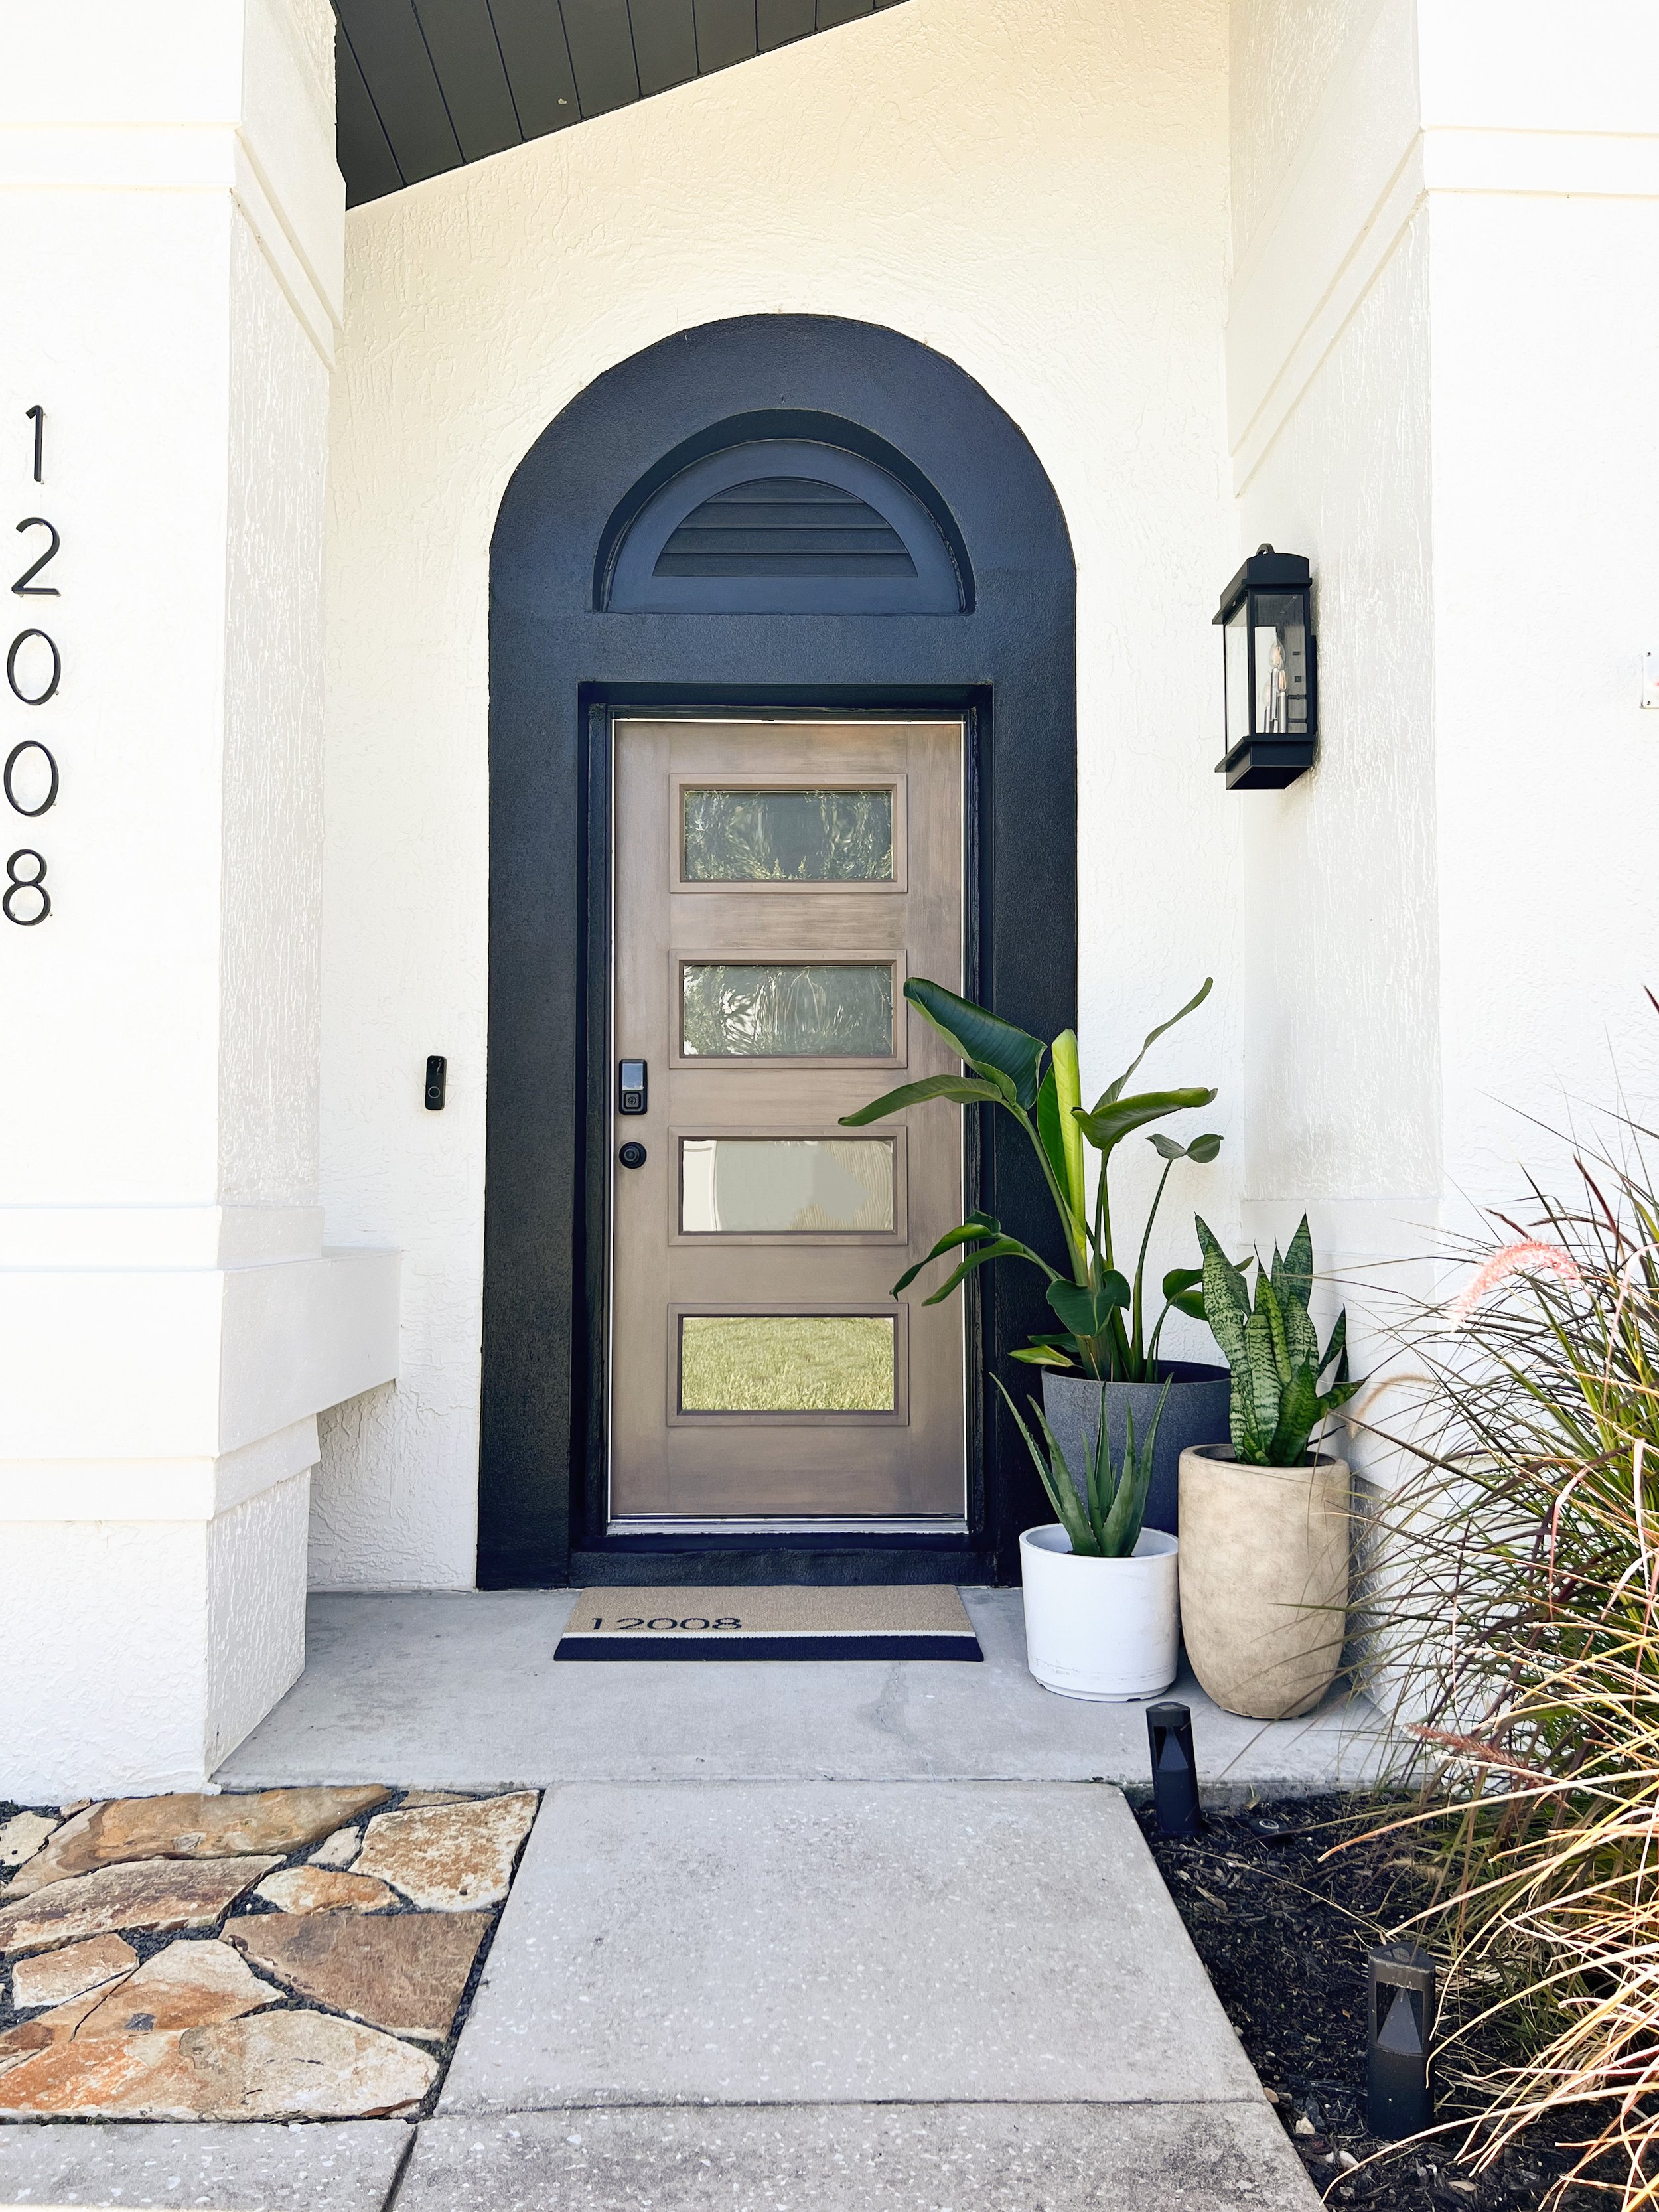
And, here’s the AFTER!

Here is the process I used to create this look….
Clean your door really well. I used windex and a lint free cloth to clean off all the dirt.
Tape off any areas where you don’t want paint.

3. Prime your door. (I used Valspar Stain-blocking Primer)


4. Choose the base color for your door and then PAINT.
I did two coats of paint but I think you could get away with just one coat. It’s okay if some of the white shows through because you will be going over it with stain.

I chose the color: SW Baquette. It is a mustard yellow color with hints of brown.
You may only want to do one side of your door, but I chose to do both sides at the same time for a cohesive look. (I know it looks like the outside color and inside colors are different, but it’s just the lighting that makes it look that way in these pics.)
5. Choose your Stain.
Note: for a Fiberglass door, you will need to use Gel Stain. There are so many colors to choose from!
For the stain, I wanted a brownish gray color so I mixed a few Gel Stains together (using what I already had on hand) to create the look I was going for. Here is the mixture that I used:
Mix - 1 part Varathane Gel Stain in Kona with 3 parts MinWax Gel Stain in Simply White. This created a light brown shade with hints of gray.

We’re not fancy over here so I just mixed it up on a paper plate. A little goes a long way!
Looks kind of like chocolate pudding! :-)

6. Tape off sections of your door prior to staining.
This allows for you to control the stain a bit more and the direction you’re applying it so that there are less streaks.
Note: you will want to make it look as much like a wood door as possible, so think of how wood connects to a door. Front piece, end pieces, etc.
7. Begin the staining process.
This step can be a bit tricky so you may want to practice on the front side of your door or another older fiberglass door. (Or you can just go for it! If it doesn’t turn out to your liking you can always repaint the door!)
Take a paint brush and begin to apply the gel stain to a small section that is taped off. Cover the section completely with the stain. A little goes a long way.
After it is all applied to the section, start on one end of the door and using a clean paint brush bring it to the other end with smooth motions. This creates a wood grain affect.
Wipe the stain from your brush after each stroke. You are basically taking the stain off of the door so that the under color begins to come through.
Repeat the process until it is to your liking.
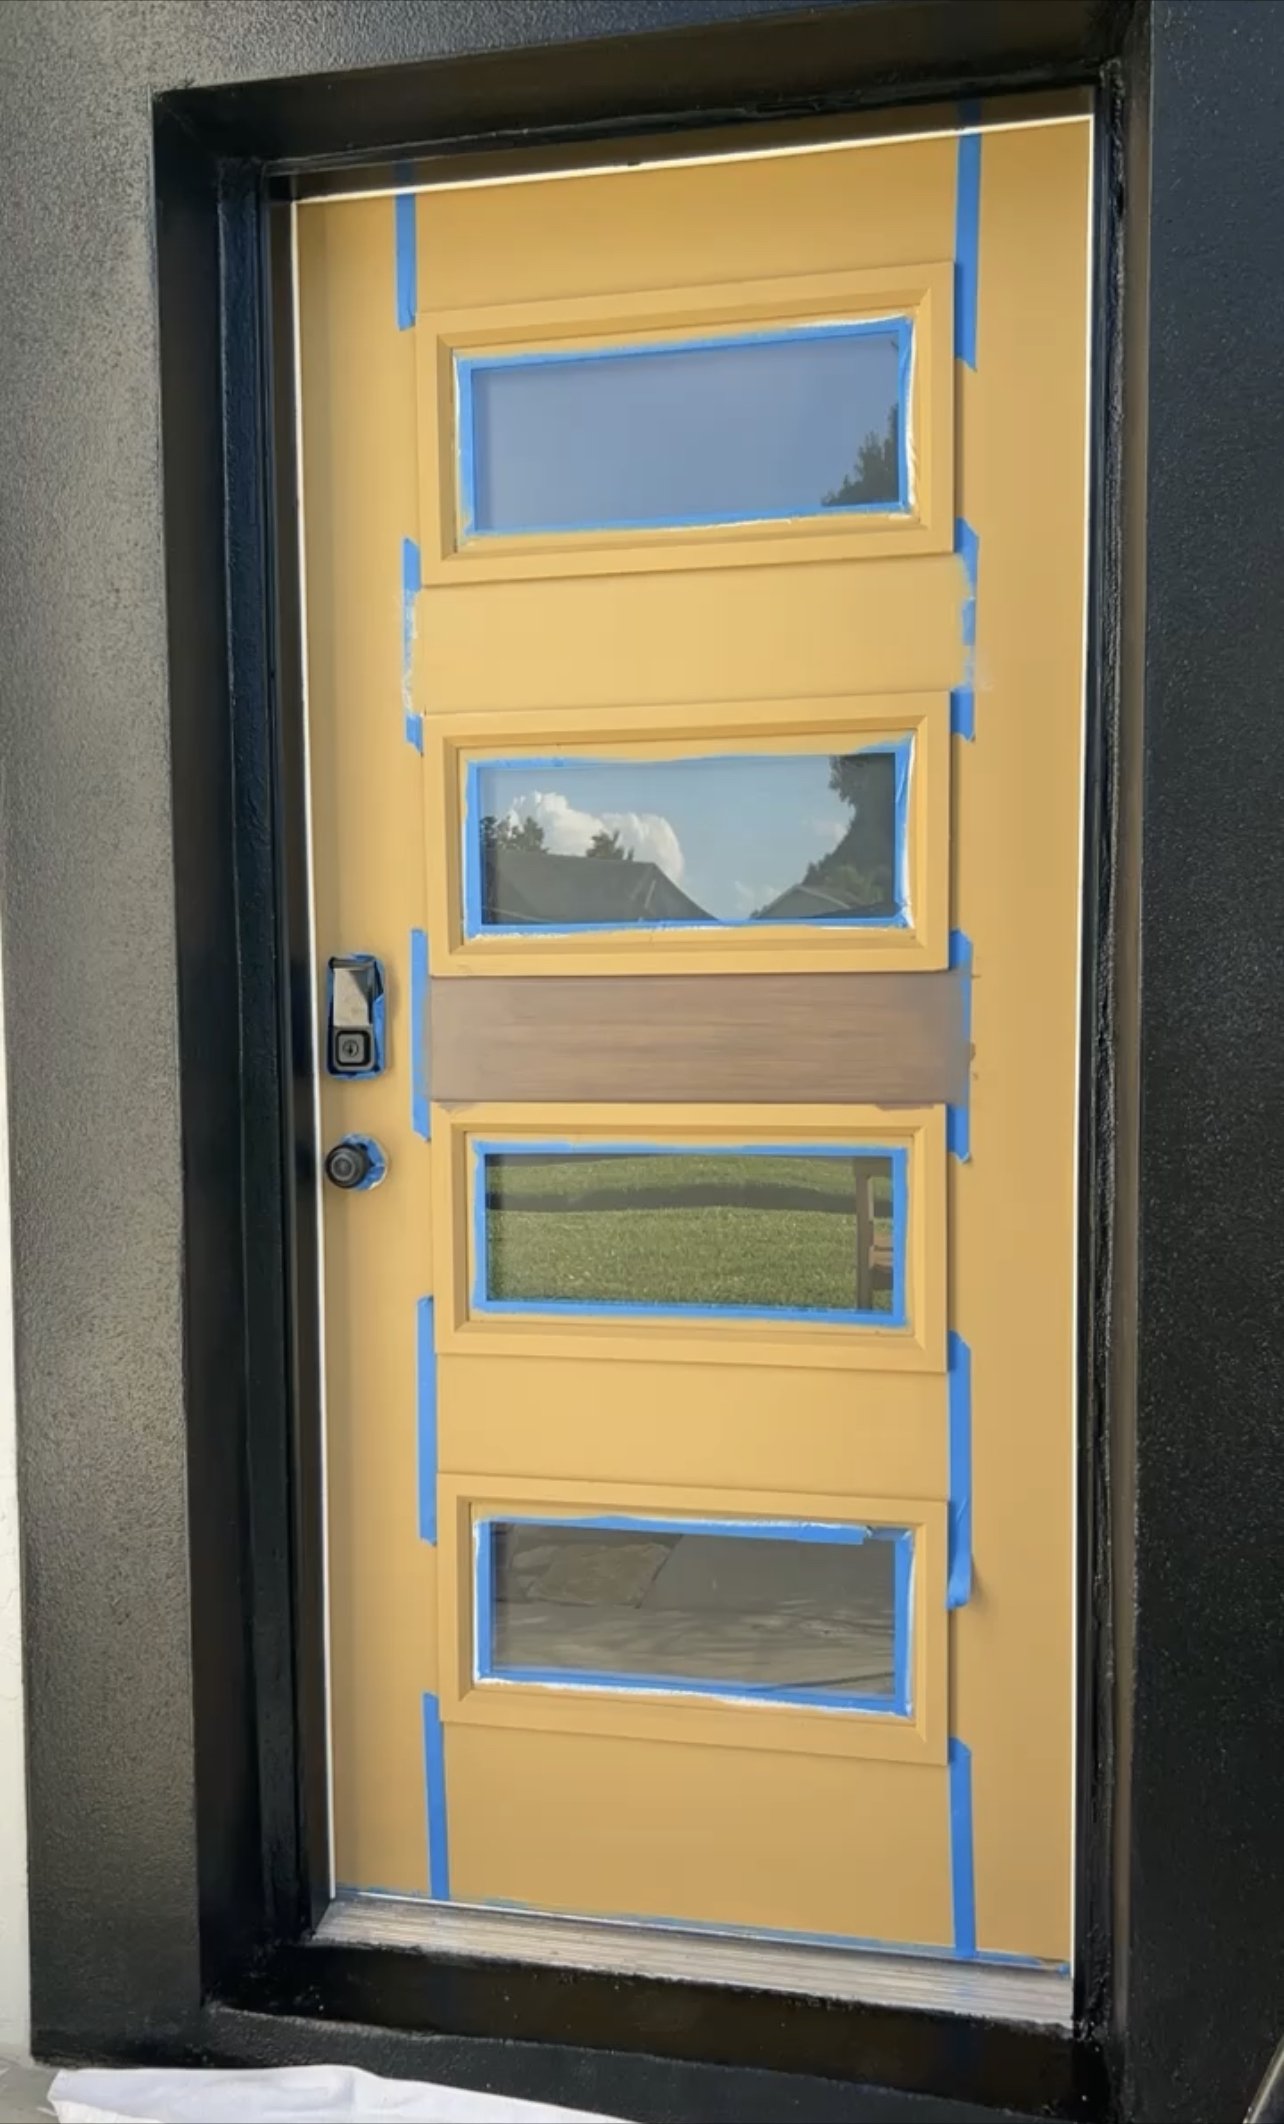
I started in the middle sections of my door and then moved to the other sections.
Note: This step needs to be done somewhat quickly before the stain dries. Try not to go over it too much as it can then begin to look streaky.
Continue working in sections and take the tape off as you go through different sections - remembering to go the way the grain of a door would normally go.

8. Let your door dry and then seal it.
I recommend waiting a week to seal it so that the door really driesl. After it was completely dry, I then used Varathane Sparurethane (satin) to seal it..
Note: I’m planning to stain the inside of the door that connects to the hinges when it’s a bit cooler outside. I didn’t want this door to be left open too long…so I decided to wait on that part. Hey, it’s hot here in Florida! :-)
Here are a few more before and after pics of this door!
BEFORE:

AFTER!

BEFORE:

AFTER!

It looks so much different, doesn’t it?
I’m also loving this personalized house number mat from Matterly! Classy and Modern!


I hope you’ve enjoyed reading through this post! Let me know if you have any questions about this project!
Happy Decorating -