
Revamping An Old Table with Homemade Chalk Paint
/
Revamping a table with homemade chalk paint
If you follow me on Instagram, you already know that one of my favorite things to do is to paint furniture using chalk paint. In fact, I think I've tried almost every brand out there including Annie Sloan, Amy Howard, Miss Lillian's, and CeCe Caldwell's. I love all of these paints and they work pretty much all the same....no priming needed with a quick drying time and little odor. The only thing is....chalk paint can be expensive when you're trying to live on a budget! When I decided that I wanted to revamp this table, I made up my mind that I also didn't want to spend a lot of money on the paint. Therefore, I chose to experiment with making my own chalk paint to see how it would hold up to these that I've tried and listed above.
Here's a view of the table that I'm painting:

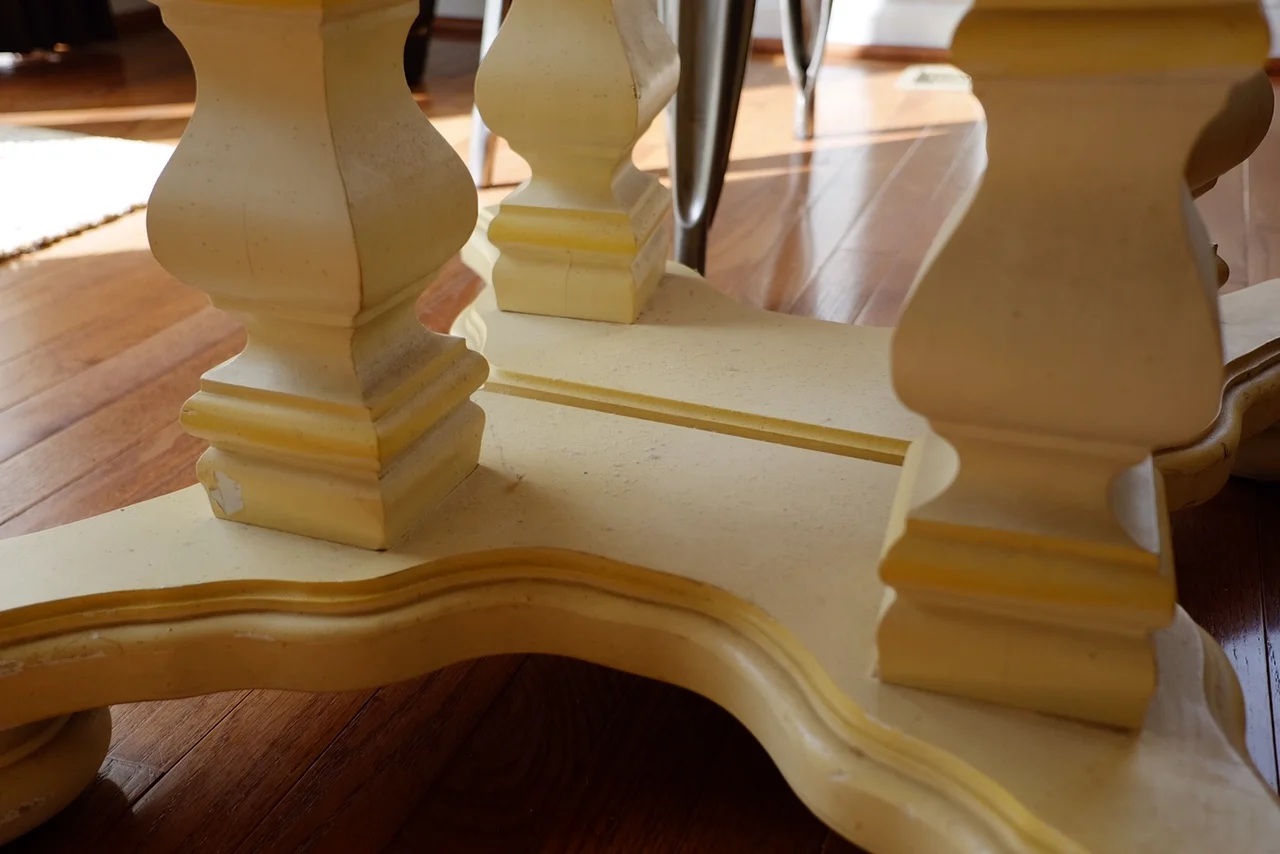
Table has a yellowy base and needs to be brightened up! :-)

Top of table also needs to be brightened up a bit,
Recipe for Homemade Chalk Paint
1/3 cup cool water
1/3 cup plaster of Paris
1 cup latex paint
Mix water and plaster of Paris together in a plastic container until smooth. Then add latex paint and mix well.

Prep Furniture:
1. I like to clean my furniture with a mixture of vinegar and water. Put 2 cups water in a bottle and mix with 1/3 cup of vinegar. Spray this solution on your furniture and wipe it with a clean cloth. The vinegar soaks up the odors from the furniture and dries quickly.

VinEGAR AND WATER WORK great for cleaning furniture!
2. Sand the top of the table with an electric sander. I don't always sand my pieces but I want this tabletop to be smooth so I opted to sand it since it had quite a few scratches in it.

Painting Bottom of Table
1. Using a foam brush, I brushed on the homemade chalk paint to the bottom of the table.

After the base is dry, sand very lightly with a 220 grit sandpaper then apply a second coat to the base.
Then, sand it again, using a bit more pressure on the edges to distress it.

Use sandpaper to lightly distress edges.
Next, wax the bottom of the table. I am using Miss Lillian's clear liquid wax (Lack Luster) which I really love. It is super easy to apply. Put a little wax into a plastic container and then wet a sponge and begin lightly going over the areas you've painted. You can also use a foam brush for the application as well.

Miss Lillian's Lack Luster - liquid wax that works wonders!
This product dries very quickly and there is no need to buff. It leaves a nice sheen as well. Stand back to see if you've missed any spots and if so, just apply another coat after the first one dries. This product layers nicely and hardens beautifully.
Painting Top of Table
To brighten up the top of this table, I'm using my homemade chalk paint and mixing in a little more water (2-3 teaspoons) so that it's the consistency of milk. This makes a "white wash" solution.
Begin by using the foam brush and apply the paint to a section of the table.

Apply Whitewash paint to section of table.

I then wipe off the paint with a clean, dry cloth....wiping with the grain so that some of the wood begins to show through.


Continue this process with the entire table...painting with the grain and wiping with the grain. You can play around with the paint and add more to areas that you've wiped too much off. Let it dry and add more paint if needed. I did two coats of the wash solution on this table.
Then, sand the table, VERY LIGHTLY to expose a bit more of the wood grain especially on the edges of the table.

Distress the edges lightly to expose wood.
Now, you're ready for the final step which is waxing the top of the table. I often use a protective sealer such as Minwax for surfaces that will be getting lots of wear, but I chose to use Miss Lillian's Lack Luster on the top of this table because it provides a sealing coat that will help avoid scratches.
I used the same application method (a wet sponge - 2 coats) but you can use a foam brush as well.
Let your table dry before placing anything on it. I like to wait at least a day! :-)

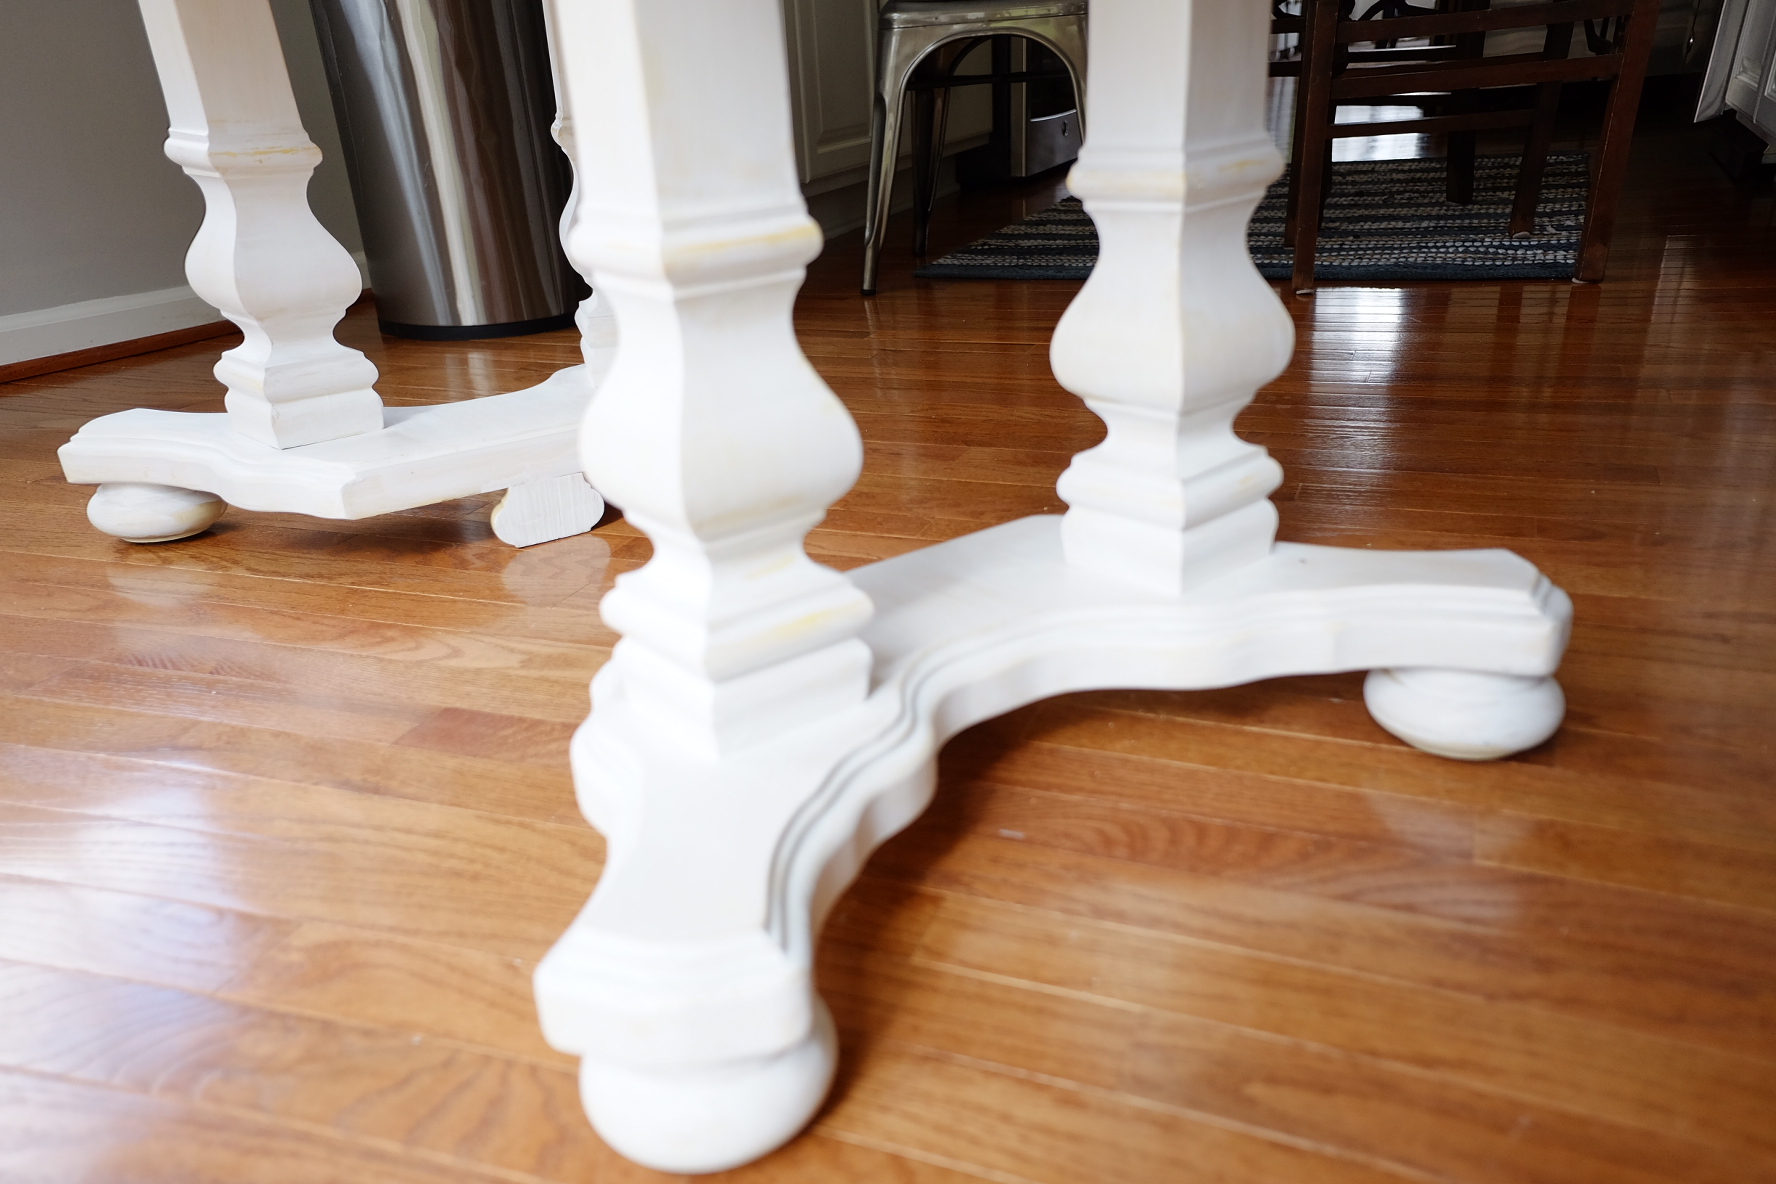
Restoration Hardware finish on top and white on bottom
Here are a few pictures of the finished product.
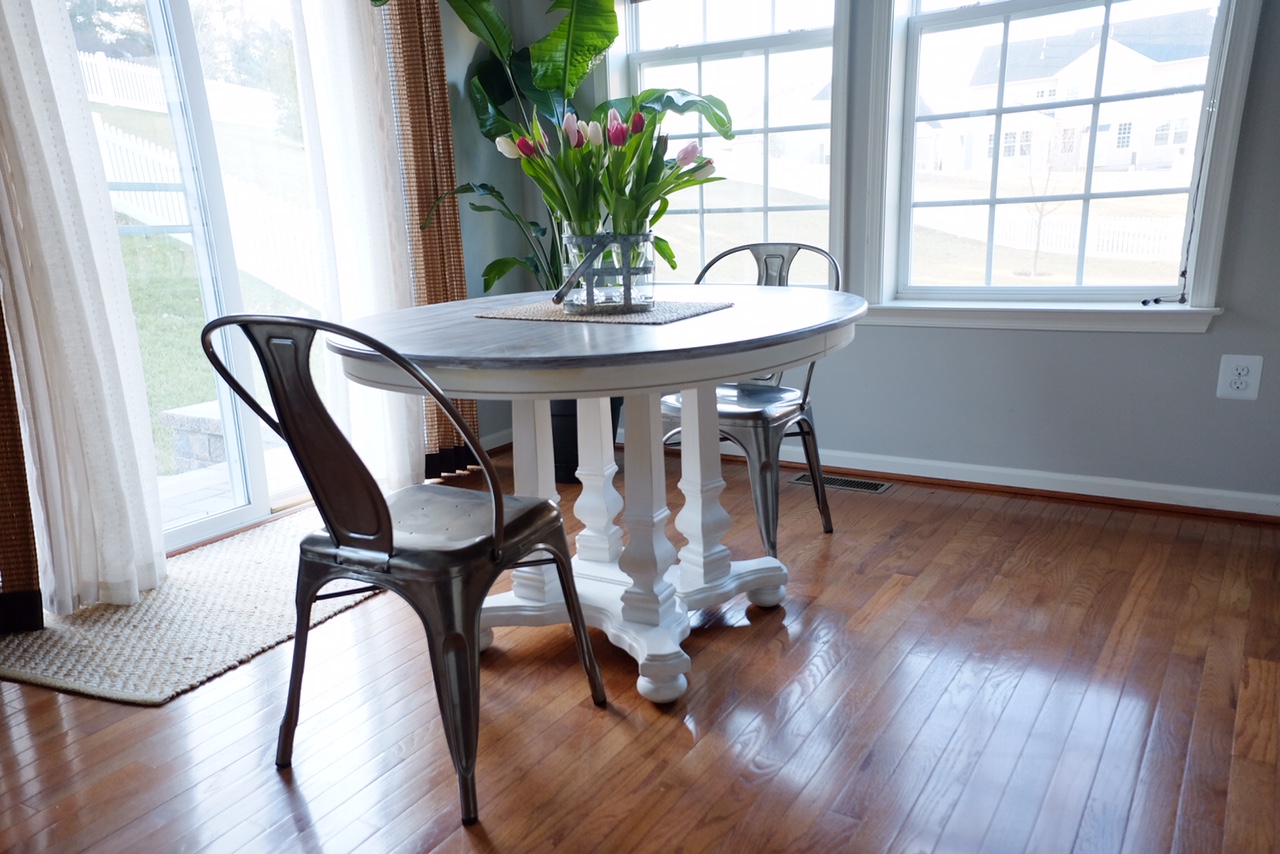
Revamp a table using homemade chalk paint.

This table looks so much brighter - homemade chalk paint.
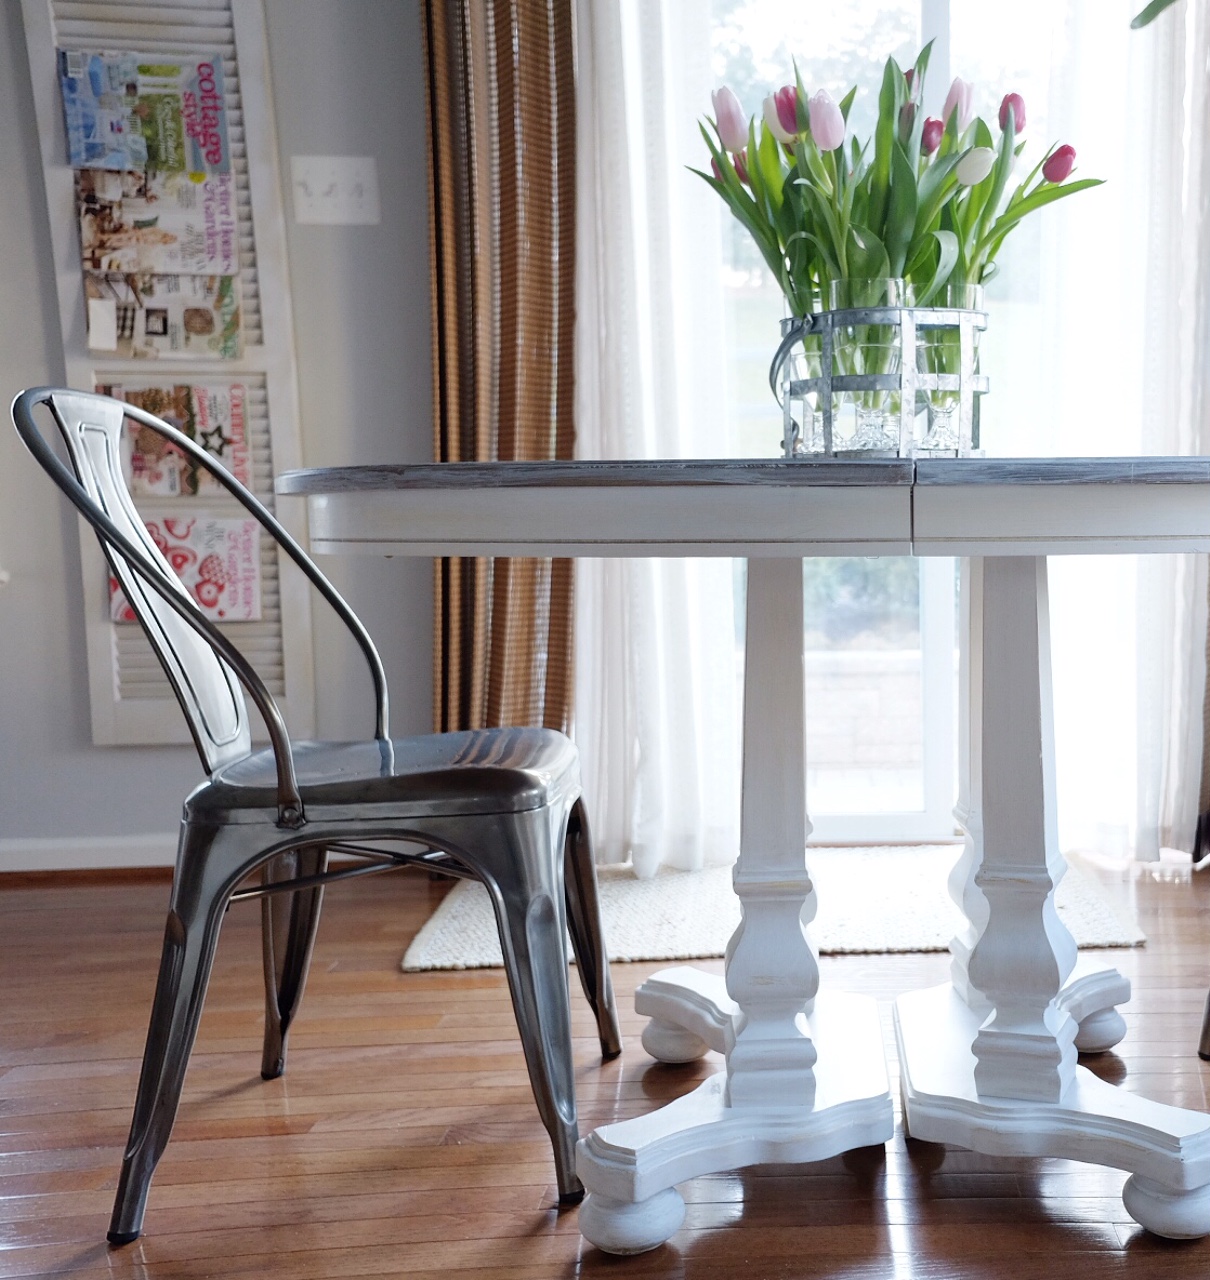
Revamp a table with homemade chalk paint.

Revamp a table using homemade chalk paint
I hope I've inspired you to experiment with making your own chalk paint. It only takes a bit more time and in the end...it will save you money!
Feel free to leave me a comment or let me know if you have questions. I wold love to help you if I can!
Happy, homemade chalk painting friends -